Showing posts with label recipe. Show all posts

Thursday, April 28, 2011

Pizza for the Common Folk


I am a lot of things, but I am not a connoisseur of pizza. Really, I’ll eat it however it comes. I know a lot of people out there aren’t like me. They want it New York style or they don’t want it at all. I suppose all the Chicago-ites (I’m really not sure what you are supposed to call them) would claim that a pizza isn’t a pizza if it doesn’t have an inch-thick crust with lots and lots of meat on top. Put either of those pizzas in front of me and I’d eat it with a big smile on my face. Heck, put a piece of Papa John’s in front of me and I wouldn’t utter a word of complaint.

Therefore, if you are a pizza snob, you may just want to bypass the recipe below. But if you do, well, I feel sorrow for you, as I do for anyone who’s prejudices keep them from enjoying the great experiences available to them, in this case, a splendid piece of pizza.

For the rest of you, these recipes aren’t rocket science. Don’t get intimidated by making your own crust and pizza sauce if you haven’t in the past. Sure, it takes a little more time, but it’s worth the flavor you get at the end. This pizza usually takes me about 1 hr and 30 minutes to make, that’s including an hour for the dough to rise and 15 minutes for the pizza to bake. So really, you’re talking about 15 minutes of hard labor here, and honey, if you can’t give me 15 minutes, well, to put it bluntly, you need more sleep or more sex in your life. Actually, probably both.

Mai’s Cheese Pizza

Pizza Dough:

1 tbsp. active dry yeast
1 c. warm water (I think they suggest 105 degrees but don’t go scrambling for a thermometer if you don’t have one setting by the sink. I trust you to figure it out. If it feels warm to you, go with it.)
3 tbsp. extra-virgin olive oil
1 tsp. sugar
1 tsp. salt
2 c. flour (I use bread flour but feel free to use all-purpose)

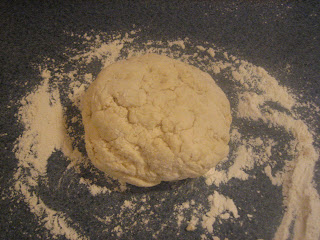
In a large bowl, mix the yeast and water and let it set for 5 minutes. Then add the remaining ingredients and mix. If you have a stand mixer, use your dough hook and let the machine do all the work for you. You won’t have to knead this by hand at all. Just keep the mixer going for about 5 minutes or until the dough looks soft and pliable, then put the dough in an oiled bowl and cover with a damp towel till it’s doubled in size, about an hour.

If you don’t have a stand mixer, use a wooden spoon or, better yet, your hands and get mixing. Once all the ingredients are incorporated, put the dough on a lightly floured surface and knead for about 5 minutes. Then put the dough in a lightly oiled bowl and cover it with a damp towel till it’s doubled in size, about an hour.

Once the dough is doubled, you have two choices. You can either divide the dough and make two smaller pizzas or keep it as is and make one huge one. I usually keep the dough together and make a big rectangular shaped pizza that fits perfectly on one of my baking stones. The choice is up to you. Either way, flop the dough out onto a floured surface and roll it out to your preferred shape and size. I wish I knew how to stretch the dough with just my fists like those short Italian guys do at the pizza joint down the road from us. It looks so macho and artistic at the same time. Oh, well. Then, put your dough on a baking sheet or stone and start adding your toppings.

Pizza Sauce:

1, 6oz. can tomato paste
1 tsp. salt
½ tsp. garlic powder
½ tsp. onion powder
2 tbsp. extra virgin olive oil
¾ c. chicken broth
¼ chopped fresh basil

Put all the ingredients in a bowl and stir to combine. If you like your sauce thicker or thinner, adjust the chicken broth measurement accordingly. Spread the sauce over the pizza dough.

Pizza Topping:

¼ c. parmesan, freshly grated
¾ c. smoked gouda, freshly grated
1 lb. fresh mozzarella, freshly grated
Freshly ground black pepper

If you have a food processor, simply put the grater attachment on and fire away. This will take you all of about 5 minutes. If you don’t have a food processor or some other easy way of grating, my heart goes out to you because I absolutely loath grating things by hand. I’m not sure why. I don’t think my mom tethered me to the kitchen counter with a box grater and a 10 lb. bag of carrots when I was a child, but I may just be blocking out the memory. I do hate it, so if you detest it as much as I do and you have no access to a machine powered grater, then I give you permission to purchase pre-grated versions of the above cheeses. If you don’t detest hand grating or if it brings you copious amounts of pleasure, consider yourself one of the lucky ones, and then get grating.

Sprinkle your cheeses over the sauce, grind some pepper on top, and stick the pizza into a 425 degree oven for 15 minutes. I like to let my pizza set for a good 15 minutes or so once it's out of the oven so it can firm up and lose some of that molten heat. Then, enjoy!

Tuesday, April 19, 2011

A Picture Worth a Thousand Licks


I know why you’re here. I know you saw this picture of a cookie to the right over there and wanted to lick your computer screen. I know because that’s exactly how I felt when I put it on there. But lucky me, I have one of these beauties sitting in a Tupperware on my kitchen counter right this very minute, waiting of me to come eat it. Beware your heart, my dear reader, jealousy is a nasty, nasty business.

Okay, I’m done teasing. But I’ll keep my words few because I sense the tension here. You’re like one of those crazed German Shepherds snarling and foaming at the end of its tether, desperately scratching the air and straining towards it’s prize. Only a moment longer, I promise.

Cade actually chose this recipe for one of our desserts last week. I’ll admit, I wasn’t all that pumped about his choice. As I said yesterday, it’s not that pumpkiny time of year and I tend to enjoy foods most when their cooked within their season. Let’s just say, I didn’t struggle to pack away three of these the night Cade made them. I would have ate three more but the children were watching.

The recipe itself comes from one of my favorite baking cookbooks out there. It’s called The Great American Bake Sale Cookbook and has the recipe for virtually ever bake sale favorite ever made from Peanut Butter Blossoms (aka Hershey Kiss Cookies) to Pecan Tassies (aka Bite-sized Pecan Pies). But that’s only where it begins because they expand the collection with rarities like Honey Roasted Peanut Butter Cookies and Country Fair Caramel Apple Cakes. The crowning glory of this cookbook is their “Salad-bar Bread”. I know it doesn’t sound like much, but I’m telling you now: You have never had a better carrot bread than this one; don’t attempt to persuade me or anyone else otherwise because it’s simply not true.

And if you aren’t convinced by now, then let me tell you that you can buy a used copy of it on Amazon for a penny. No more excuses.

Now, without further ado, the recipe.

Great Pumpkin Cookies

Cookies:
1 c. butter, softened
½ c. white sugar
½ c. packed brown sugar
1 c. canned or fresh pumpkin (if you’re using fresh, make sure you squeeze out as much moisture from it as possible before adding to the batter)
1 egg
1 tsp. vanilla
2 c. flour
1 tsp. baking soda
1 tsp. baking powder
2 tsp. pumpkin pie spice
¼ tsp. salt
¾ c. chopped walnuts (optional)

Penuche Glaze:
3 tbsp. butter
½ c. packed dark brown sugar
¼ c. milk
½ to 2 c. powdered sugar

Preheat the oven to 350 degrees.

For the cookies, cream butter and sugars until light and fluffy. Blend in pumpkin, egg, and vanilla. Mix in flour, soda, baking powder, pumpkin pie spice, salt, and nuts. Drop by tablespoonfuls 3-inches apart on ungreased baking sheets. Bake 10-12 minutes until golden around the edges. Lift warm cookies from baking sheet with spatula, and transfer to racks. Cool about 30 minutes, then spread with glaze.

For the glaze, heat butter and brown sugar in medium saucepan until bubbly. Cook, stirring constantly, for 1 minute until slightly thickened. Beat in milk. Blend in enough powdered sugar to make glaze a smooth, spreadable consistency.

Monday, April 18, 2011

My War on Freezer Burn


I know it’s a little past the pumpkin season, but nonetheless, pumpkin will be starring in both today’s and tomorrow’s recipes.

Here’s the deal: I hate freezer burn.

It’s probably because this nemesis of mine has been the primary cause in the premature deaths of dozens of gallons of ice cream in my lifetime. Granted, ice cream in my house doesn’t often stick around long enough to put it at such risk, but inevitably there comes a day when my comfy jeans morph into my tight jeans and, therefore, I make this covenant with myself to abstain from my nighttime bowl of ice cream. For about 3 weeks, I succeed.

All the while, this unsuspecting ½ gallon of Chocolate Peanut Butter Swirl patiently waits for me to return for my nocturnal visit and with each passing day, and a silent death sneaks under the cardboard lid, and slowly, ever so slowly begins to crystallize the sweet, pillowy surface of my ice cream. And with this glassy exterior comes a flavor, deep within, that’s hard to describe. It’s the subtle yet overwhelming taste of a winter overstaying its welcome: stale cold. So when, at the end of 3 weeks, I crumble under the weight of my sweet tooth and hungrily pry off the lid to my peanut buttery escape, I find my ice cream is dead.

I hate death, the death of anyone or anything (but really just ice cream because the death of prejudice and evil and stuff like that I’m cool with).

“What on earth does this have to do with pumpkin?” you ask.

Well, last fall, I cooked and pureed a couple of pumpkins and stuck the goods in my freezer. Since I’m kind of anal about the whole “icy death” thing, I like to use freezer stuff up within 6 months. It just so happens that recently Shawn and I had lunch in this artsy little cafĂ© that served a kickin’ Thai Pumpkin Curry. Ever since then, I’ve wanted to recreate it, and so I finally have. I loved the results so much, that I’m sharing it with you, proving yet again that good can come out of evil.

(On a side-note: Once again I’m doing the step-by-step picture thing. I guess I’m doing it because I just so happened to have my camera nearby when I was making this. And it’s kind of like an Easter present, too. So enjoy.)

Mai’s Spicy Pumpkin Curry Soup

1 tbsp. extra virgin olive oil
2 green onions, white and light green sections only
2 garlic cloves
8-10 Thai red chilies
½ tsp. turmeric
1 tbsp. red curry powder
1 can coconut milk
2 c. fresh or thawed frozen pumpkin (I didn’t squeeze all the extra moisture out of mine so I’m imagining this would equal about 1 can of canned pumpkin, but if you’re using canned, you may want to add a little sugar along with it.)
2 ½ c. vegetable stock
½ c. fresh cilantro (a small handful—no need to be precise here)
salt and pepper to taste

This is a “dump it” recipe at its finest. Heat your oil in a large pot.

Put the onions, garlic, and chilies in a food processor and pulse it up a couple times till it’s chopped up enough for your liking.

Dump all of this into the pot and stir, just to get everything sizzling.


Now toss in the turmeric and curry powder. Scoot it around the pan for about 30 seconds so the flavors start to release and get toasty.


Now add your pumpkin,


coconut milk,


and veggie stock.


Let it simmer for about 15 minutes. Meanwhile, pulse the cilantro just enough for a rough chop; if you overdo it here, you’ll have cilantro paste.


Sprinkle cilantro on top, add salt and pepper to your liking, and serve with crusty bread, or better yet, Mai’s Crazy Good Wheat Bread.

Tomorrow, I'm putting another cookbook and a Pumpkin Cookie recipe on your list of "must-haves".

Thursday, April 14, 2011

Warning: Weight Gain Ahead


In one of the comments on Tuesday’s post, my friend Kim expressed some concern about possible weight gain with the “kids in the kitchen” experiment. If you are in some turmoil about whether such a thing would happen, please let me put your mind at ease.

You will, most assuredly and without a doubt, gain weight during this experiment.

In addition, you will eat far more helpings than you are actually hungry for and gulp down multiple cookies when your stomach wants just the one. Basically, you’ll give yourself permission to gorge guiltlessly all in the name of boosting your child’s self-esteem.

“No, I won’t,” I hear you whisper under your breath.

Yes, you will. Why?

Because when you begin to lay your fork down in surrender to a pleasantly content belly, they will look at you with those large, needy eyes, silently whimpering, “You didn’t really like it after all. I knew you were just acting or else you would have cleaned your plate like you always do at Red Robin when they give you those huge burgers the size of your head and a bushel basket full of fries and you eat every last bite and moan and complain about how full you are but then you say it was so worth it because it tasted so good. The plate of pasta I gave you was barely the size of your right hand and you’re not even close to finishing that. I knew I was a crappy cook.”

And so you will pick up your fork again, saying “Whew, I just needed to give my arm a rest because my bicep was aching from all that eating! Honey, can send the pot this direction because I want to load up my plate; it’s looking barren.” And their eyes will soften and fill with love, and your bulging mid-section will seem such a small sacrifice for the great acceptance they feel at that moment.

Honestly, though, the whole experiment is truly a labor of love in many ways. Please don’t imagine the Smucker kitchen is all fun and giggles each night as we cook together. More than once I have uttered “could you watch what you’re doing and stop making such a mess” or “you’re the one who picked out this recipe so you’re the one who has to stand at the stove stirring it for 15 minutes so I really don’t care if you arm does fall off.” I’m no Ma Ingalls, especially at the end of a day full of whiney babies, more loads of laundry than I care to disclose, and 4 hours of homeschooling. But still, they love it…and so do I.

In honor of the approaching Easter holiday, I thought I’d pass this recipe your way. Lucy chose to make this on Monday after her Primavera Pasta. It’s not mind-boggling in it’s complexity or sophistication. It’s basically butter, sugar, and M&M’s…so just be prepared to eat at least half a dozen.

Consider yourself warned.

Lucy’s M&M Easter Cookies (adapted from The Great American Bake Sale Cookbook)

14 tbsp. butter, softened (you’re looking at 2 tbsp. shy of 2 sticks)
¾ c. packed brown sugar
1 tsp. vanilla
1 egg
1 ¾ c. flour
1 tsp. baking soda
1 tsp. salt
1 ½ c. Easter-themed M&M’s

Preheat oven to 350 degrees. In a large bowl, cream the butter and sugar. Then add the vanilla and egg. Next, mix in the flour, baking soda, and salt. Stir in the M&M’s. Drop large spoonfuls (I’m talking heaping tablespoons) onto greased (or Teflon-covered) baking sheet. On a complete side-note, if you do a lot of baking and do not have one of these Teflon sheets I’m talking about, please forgo your morning latte from Starbucks for about three days and then use the money to purchase one. Okay, back to the business at hand…

Bake cookies for 12-14 minutes or until the edges begin to turn golden brown. The centers might still be a bit doughy, but no worries, my baker-friend; they will firm up once out of the oven. Just let them set on the sheet for a couple of minutes before you move them to a rack to cool.

They’re cute. They’re buttery. And they contain chocolate. Time to get on your stretchy pants, folks.

Wednesday, April 13, 2011

If I Make into Heaven, I Hope Le Creuset is Waiting There for Me


Every Thursday I sit the kids down at our dining room table with about 6-12 cooking magazines or cookbooks and they begin their weekly search for their prized recipes. You have to understand, should someone sit me down in front of two Jamie Oliver cookbooks, a Nigella Lawson, and 3 months worth of Bon Appetit and say, “You must look through these and pick out at least 4 recipes so I can pay for all the groceries for each recipe and set aside time for you , and you alone, to cook them”, I would weep from the pure joy of it all. That is heaven to me. I imagine that one day, when I die, there will not be streets of gold or mansions of splendor waiting for me. No, it will be a kitchen, with an eternity of counter space, a Viking gas range, Le Creuset cookware, and a Whole Foods next door.

My kids, however, find the experience of searching for recipes a little less spectacular than me. For the first 30 seconds, they really dive into the cookbooks, turning the pages hastily, looking for pictures of dishes that catch their eye. About a minute into it, they call for another cookbook. Mind you, they have Nigella Express sitting in front of them, a 300+ page dictionary of culinary gems, but they’ve tired of it and want something new. No, I can’t relate, but I can toss them another book because I have lots and lots of them. And after about the 3rd or 4th book, they find what they are looking for: Sauteed Shrimp with a Fruit Platter, Camembert Pasta, Moraccan Lamb Chili, or Pea Soup.

Yeah, I said Pea Soup. That’s Lucy’s choice for later this week. I don’t usually do this, but I actually tried to intervene with the process on this one. “Luce, are you sure that’s what you want to pick? I mean, we could get another cookbook down if you want?” But she stuck to her guns.

For the most part, their choices have been at the very least, good, and some have been superb. Today’s recipe is one of my favorites so far. It happens to come from a cookbook No Cook Pasta Sauces that I reviewed last summer. We didn’t follow that recipe to the“T”, kind of made up our own, but the result was delicious.

Lucy’s Primavera Pasta

2 tbsp. extra virgin olive oil
2 tbsp. softened butter
2 garlic cloves, crushed
½ c. freshly grated Romano cheese plus extra for serving
4 plum tomatoes, seeded and diced (or if your kids don’t like chunks, whizz them in the food processor a couple of times)
½ c. frozen green peas, set at room temp for about 30 minutes
1 tbsp. basil paste or ¼ c. freshly chopped basil
1 tsp. salt
Freshly ground black pepper to taste
½ lb. whole wheat egg noodles

Put all ingredients, minus the noodles, in a large metal or glass mixing bowl. Bring a large pot of water to a boil. Add noodles and cook according to package directions. While noodles are boiling, place mixing bowl with sauce ingredients over the pot. Leave it there long enough to melt the butter and cheese, making a thickish sauce. When noodles are finished, toss with sauce and serve with extra Romano.

Very easy. Super-kid friendly (most everything she did herself, including chopping the tomatoes). And ultra-quick (kitchen to table in less than 30).

And tune in tomorrow when I discuss inevitable weight gain and Lucy’s Easter M&M Cookies!

Monday, April 11, 2011

The Black or White Issues of Life: The Fig

Living in this postmodern era of ours, we've begun to think of things far more in a shade of gray rather than black or white like our modernist forefathers. But I think there are still some subjects that evoke polarized opinions in 99% of folks out there and the one I'm talking about specifically today is the one, the only...fig.

I love figs. That's not surprising because anyone would be hardpressed to find a food that I don't enjoy, as long as it's not black pudding (honestly, though, I've never tasted it but the mere thought of ingesting curdled pig's blood is unsettling on so many levels) or any fruit with the suffix "-melon" (and this one I simply can't explain--there is just something about my tastebuds that refuse to blossom in the presence of this rinded beauty--I want to love it but I simply can't).

But I'm willing to argue that if you don't love figs, you probably hate them. With that in mind, I proceed to the following recipe knowing that I will possibly alienate some of my readership for today, but I'm willing to take that chance because, well, it's a great recipe and those fig-lovers out there deserve to have it.

You know that I'm a compulsive label reader and ever since I read the ingredients on a package of Fig Newtons, I can no longer enjoy them with a clean conscience. They've got all the bad boys in there, including the notorious high fructose corn syrup and partially hydrogenated oil. So there I was without a Newton to nibble, and then I stumbled upon this recipe, the answer to my craving.

Disclaimer: These are by no means "healthy". They are healthier because they don't have some of the bad stuff in them, but they're still made with white flour and refined sugar. I imagine you could recreate them into something ultra-healthy with some wholewheat flour and honey, but that wasn't what I was looking for. I just wanted a non-lethal Fig Newton and that's exactly what these are.

Mai's "Arguably Non-Lethal" Fig Bars

6 tbsp. cold butter, cut in pieces
1 c. plus 2 tbsp. flour
1/2 c. plus 2 tbsp. sugar
1 1/2 c. dried figs
1/2 c. Simply Lemonade (Here's the deal: if you don't have this brand of lemonade, then you have to find one, or make your own, that only contains, water, lemon juice and sugar. You absolutely cannot use the stuff that comes in the plastic gallons at the gas station. Don't ask me why, just trust me on this one...Okay, so the reason is that those cheapo lemonades have all the bad stuff in them that the packaged Newtons have so if you use them, then really what's the purpose. Alright, I'm done preaching.)
1/4 c. water

Preheat your oven to 375 degrees. Line a 8x8 inch pan with a sheet of foil with enough overhang on two sides to lift the bars out when they've cooled. Butter the foil.

In a food processor, blend 1 c. flour, 1/2 c. sugar and butter chunks until you have a coarse looking mixture. Press half of this mixture into the foil-lined pan and set the remaining crumbs in a bowl to the side.

Back at the food processor, blend together the figs, lemonade, water, and remaining 2tbsp. each of flour and sugar. Keep pureeing this mixture until it forms a thickish paste. Spread this paste on the crumb base in your pan and then sprinkle remaining crumbs on top of the fig paste.

Bake bars for 30-35 minutes, or until beginning to brown. Cool completely in pan, then, using the foil overhang, remove the whole square from the pan and cut into bars. Makes 16 bars.

Wednesday, April 6, 2011

A Belated Christmas Gift

The other recipe I want to share with you from my winter in trenches requires a bit of a rewind on the holiday calendar. I know that Easter is fast approaching and thoughts of Christmas are far (and for some, thankfully) behind us, but this recipe was birthed out of that season. Just hang with me here because the recipe at the end of it is so so so worth it.

Christmas has always been, and I presume always will be, my favorite holiday. And there is even more to love about Christmas now that I have children of my own: the light footfalls approaching our bed early on Christmas morning, coming to announce that Santa came and the presents are waiting; the bridled eagerness as we read the nativity story, their sleepy eyes scanning each gift, trying to determine which ones are theirs; the spray of shredded wrapping paper as the treasures are revealed, accompanied by a near scream of “Mama, look what I got!” Children make Christmas.

But presents to yours truly certainly don’t put a damper on the occasion. There is still a bit of a kid nestled inside this grown up body. And while my husband hasn’t had a stellar record for gift-giving in the past, he completely outdid himself this past Christmas and it came in two words: immersion blender. For some this may seem a bit anti-climactic, others may utter a hearty “right on!” Either way, let me assure you that I was more than pleased and immediately began looking for things to puree.

However, my searching efforts came to a quick halt as soon as the Christmas morning munchies mustered their first attack. Perhaps I am strange in this, but hunger seems all the more intensified on Christmas morning. Maybe it’s all that adrenaline pumping and present unwrapping, but by about 8:15am I was ready to tuck into a 20 oz. steak or 6 egg omelette. I went the sweet route instead and made a batch of these delectable cinnamon rolls, which were received with rousing cheers from the romping, ravenous natives as they abandoned their new toys and rushed the breakfast table. Hence, a Christmas morning tradition was born in the Smucker household.

Oh, and one more thing…Pillsbury, eat your heart out—you couldn’t touch these babies with a thirty-nine and a half foot pole (had to do a shout out to “The Grinch”).

(So I’ve decided to do a sneaky little trick that several of you have been urging me to do. I’ve photographed each step in the prep of these rolls. Please, don’t expect this kind of attention to detail with each recipe from here on out. In fact, don’t ever expect it again and then you might be pleasantly surprised again one day. Kind of like Christmas morning.)
Mai’s Buttermilk Cinnamon Rolls
2 c. flour

1 tbsp. baking powder

1 tsp. salt

¼ tsp. baking soda

¾ c. buttermilk

¼ c. vegetable oil

6 tbsp. butter, room temperature

½ c. white sugar

¼ c. brown sugar

1 tsp. cinnamon

Preheat oven to 400 degrees and butter a 9-inch round cake pan.

In a large mixing bowl, combine flour, baking powder, salt, and baking soda. In a glass measuring jug, combine buttermilk and oil.

Pour buttermilk mixture into flour mixture and stir just till everything is nice and wet. Don’t overmix here or you won’t have the wonderfully flaky texture that makes my heart flutter right now just thinking about it. Turn your dough onto a generously floured surface and flour your rolling pin as well.

Gently pat the dough into a rectangle and start rolling until you’ve got a 15x8 inch rectangle.

Spread your softened butter over the entire surface of the dough except for about a ½ inch border around the edge. In a small dish, combine sugars and cinnamon. Sprinkle this concoction evenly over the butter.
Then roll up the dough, starting with the long side, giving yourself a long log. Pinch the seam. Then cut off 1 ½ inch slices.
Place them cut side down in your greased pan. Bake in the oven for about 30 minutes or until a light golden brown.
Eat them about 10 minutes after you take them out of the oven: not too hot to scald your tongue with the molten hot sugar filling but still warm and flaky and sublimely delicious. It is my belief that these rolls need no obnoxious addition otherwise known as icing. But if you daren’t dream of eating a cinnamon roll without drizzled sugar on top, then by all means whisk up some powdered sugar, milk, and vanilla to satisfy your obscene sweet tooth. And a very Merry and very belated Christmas to you all!

Monday, April 4, 2011

Out of Hibernation

I’m back.

Folks, the truth is that I haven’t written for 4 ½ months because I had so little to actually write about this winter. My menus were monotonous to say the least. I can’t, with any amount of self-respect, tell you how many times I made chili. Sad thing is, my kids just kept eating it.

I hate to pass the buck here, but that crazy winter weather zapped the creativity right out of my DNA. I think a lot of it centered around the fact that going to the grocery required a Herculean effort just to get to the car let alone the actual store.

See, we live down a ¼ mile gravel lane in the country and we don’t own a car with 4-wheel drive. Stupid, really, but it is what it is. Add on top of that the fact that we have a sizeable little hill in front of our house that turns into some sort of unearthly demon mountain once it’s covered with snow or ice. Really, it’s like having Mt. Everest between your front door and your minivan, and every time I even thought about running out to the store to whip up something fun and creative in the kitchen, the demon mountain immediately suffocated the idea.


Ah, but spring is here (I hope) and while our home in the country can be rather daunting in the winter, I can’t think of a better place to be in the spring. So my creative wheels are turning again, thus my fingers have begun their typing.


Yet I can’t deny the fact that the muse did strike a couple of times this winter, lending some recipes that will most definitely go in the Smucker Family Cookbook. The one I’m going to share with you today is one of my favorites and by far one of the easiest recipes I’ve ever made.


I know I have in the past decried convenience foods for all the harmful things they add to our diets and, henceforth, our bodies. So perhaps you could call the following recipe kind of hypocritical because it does rely on one little glorious tube of a bright green concoction that I affectionately call “basil paste”. You find it in the produce section, usually close to the area where fresh herbs are sold. No, this is not a fresh herb, I know. But on the tube it says that “it’s made from organic basil” so that makes me feel a little better about myself.


Okay, enough self-berating and onto the recipe:


Mai’s Pasta Sauce


1 tbsp. extra virgin olive oil

½ c. finely chopped onions

2 garlic cloves, minced

1 tbsp. basil paste (if there isn’t a foot of snow outside my door and Mt. Everest to climb, I’d use 2-3 tbsp. chopped, fresh basil instead of the paste here.)

1, 28 oz. can crushed tomatoes (I’d go for the best quality here. I like to get the cans with the exotic sounding names like “Cento” or “Furmanos” but then I usually see on the back of the can that it’s actually packaged in some remote town in Indiana. Oh, well, it still sounds cooler than “Hunts”.)

1 tsp. coarse salt

1 tbsp. raw sugar

A couple turns of freshly crushed pepper


Heat the oil in a saucepan. Saute your onions and garlic for about a minute or so, just till things start smelling good. Add your paste, scoot it around the pan with the onions and garlic, then add the tomatoes, salt, sugar, and pepper. At that point, I let it simmer for about 15 minutes or so, just to marry the flavors a bit. Then give it a taste and adjust the seasonings as you like.


Honestly, I love this sauce. I haven’t bought a jar of spaghetti sauce for probably 6 months now. The flavor is so fresh and lively, and when I set a bowl of pasta with this sauce on it in front of my kids for lunch, they absolutely devour it with huge smiles on their messy little faces. Need I say more.

Thursday, October 28, 2010

Autumn on Your Dinner Plate: Mai's Baked Sweet Potato with Apple Cider Chili

First and foremost, a huge “Thank You!” to the wonderful group of ladies who came out for my first cooking class on Tuesday night. You ladies calmed my nerves and made my first teaching experience a complete delight. My head is already swirling with recipes for next week—I can’t wait!

Quick question: where would you rate an apple on your favorite fruit countdown? I’m thinking that, before this autumn, I’d probably have put it somewhere around 10 or so. Most of the berries would shimmy in before it, as well as nectarines, peaches, and grapes. I just never thought apples had a whole lot of pizzazz to offer, say compared to a mango or a kiwi. It was the old standby. If all else in the fridge was moldy or out of date, I could always count on a trusty apple from the crisper drawer to squelch my hunger. I guess I would go so far as to say I “loved” apples, kind of like you love that old baby doll with the dislocated shoulder and a lazy eye—when every other preferable comfort is nowhere in sight, she’s always up for a cuddle.

However, this fall I found my love for apples grew into somewhat of an obsession. Every week I would make a stop at a little roadside stand on White Oak Rd. and their incredibly diverse selection of apples began to peak my interest in what I thought was a fairly simple fruit. Each time I visited this stand, they had at least a dozen different types of apples to choose from and whenever I returned they usually switched out at least 2 or 3 varieties for new ones.

“Impressive,” I thought, considering that when I went to the grocery story, I maybe had 4 or 5 types to choose from. So I began to try to widen my apple horizon. When I went to this little stand, I always got at least a couple pounds of galas, granny smiths, and red delicious for my kids (those are their favorites) and then I also grabbed a couple varieties unknown to me just to try them out. And slowly, apple by apple, I found myself falling in love with this unassuming little orb all over again.

Then, after a little investigation on the web, I found out that there are over 7500 different types of apples; you could actually eat a different variety every day for 19 years! Well, well, well, little miss apple, you just moved your way right up to the top of my favorite fruit countdown. You had levels I never knew existed under your thin tasty skin.

Now, every single day involves some type of apple product, whether a mug of warm apple cider after breakfast or sliced apples and cheddar cheese for lunch. I think the kids are kind of “appled-out”, because every single time that they say “Mom, I’m hungry” in that pleading kind of voice, I respond, without fail, “Go get an apple.”

Thus, my obsession has led me to this: Apple Cider Chili. And it’s good. Really, really good. Put it over top a warm baked sweet potato and you pretty much have autumn smack dab in the center of your dinner plate.

Mai’s Apple Cider Chili over Baked Sweet Potatoes

2 lbs. ground beef, browned and drained
2, 15 oz. cans of kidney beans
3, 8 oz. cans tomato sauce
½ c. apple cider
1-2 tbsp. brown sugar
6 large sweet potatoes

Chili Seasoning:
1 tsp. onion powder
1 tbsp. chili powder
1 tsp. salt
1 tsp. garlic powder
1 tsp. ground cumin

Toppings: Cheddar cheese, green onions, sour cream…

Preheat oven to 350 degrees. Pierce potatoes with fork several times. Wrap potatoes with foil and bake for 2 hours, or until tender.

Meanwhile, combine first five ingredients in large pot over medium heat. Combine Chili Seasoning ingredients in a small bowl. Add seasoning to simmering pot and continue to cook on low for about 45 minutes.

When potatoes are ready, serve hot chili over potatoes, using whatever toppings you like.

If you are a little hestitant about serving this to your non apple-loving friends or family, have no fear. My husband doesn’t like apples in the slightest and he couldn’t stop raving about this chili. And if you’re not feeling all that adventurous and want to leave the apple cider out and make straight-up chili, just add another can of tomato sauce and you’re good to go!

Sunday, October 24, 2010

'Rock My World' Rocky Road Brownies

I think it was sometime back in the summer that I went on this campaign against sugar. I had high hopes of reshaping my palette to enjoy the organic delights supplied by Mother Nature, basically fruit and raw honey with the occasional indulgence in dark chocolate. Well, that was 2 months ago.

I’ve slowly veered from that path, shall we say. Don’t get me wrong, I still think it’s a worthwhile goal to aim for, but I don’t feel the urgency I once did. Right now, after a day of homeschooling, grocery shopping, laundry, vacuuming, and countless diaper changes, the last thing on my mind is denying myself the pleasure of a chocolate bar or a brownie should I want one.

I guess you could chalk it up to a lack of self-control, but I wanna be kind to myself, so I say that it’s my one well-earned indulgence. I might have to revisit this concept if my pants start feeling snug, but for now, it works.

So if, by some chance, you are looking for a sweet escape today or, more innocently, just a fun little treat to serve at a game night with some friends, here’s a wonderful and very easy dessert that gets me all kinds of fabulous compliments every time I serve it. (Unfortunately, Martha Stewart really deserves all the credit since it’s her recipe, but in her stead, I will happily receive the accolades.)

Rocky Road Brownies

1 stick butter, cut into pieces
1, 12 oz. bag chocolate chips, divided
½ c. granulated sugar
½ c. brown sugar
½ tsp. salt
2 large eggs
¾ c. flour
1 c. mini marshmallows
½ c. chopped nuts (I prefer pecans.)

Preheat oven to 350 degrees. Line an 8-inch square baking pan with parchment paper, leaving some overhang so you can lift the brownies out of the pan when they’re done. In a saucepan over low heat, melt the butter and 1 cup of chocolate chips. Remove from heat and add sugars and salt, then eggs, and finally flour, stirring just until combined. Spread batter evenly in prepared pan. Bake for about 35 to 40 minutes.

Remove from oven and sprinkle remaining chocolate chips, marshmallows, and nuts over top. Place back in the oven and bake until chocolate is shiny and marshmallows are puffed, about 5 minutes. Cool completely in pan. Using paper overhang, lift cake out and cut into bars.

I hate to hide behind any false assumptions so let me make it clear right here and now--in the past I have used this concept with a boxed brownie mix. No, I'm not proud of it, but it worked beautifully nonetheless. I followed the directions on the box, then just added the toppings to take the end result up a few notches. No one ever knew the difference...except me. Yes, I felt guilty because I'm such a "from scratch" kind of girl. But we all have our dark hours. I guess that was one of mine.