Showing posts with label main dish. Show all posts

Thursday, March 15, 2012

How to become "The Best Cook in the World" (by Cade's standards)


Aside from the occasional batch of chocolate chip pancakes, I’ve done about zero cooking in the past week or so. I had 2 cans of cannellini beans and one of vegetable broth staring back at me from the narrow ledge behind the kitchen faucet. They’d been sitting there for 3 weeks, trying their best to look pathetic and unwanted, the bottom edge of one can slowly rusting in the small puddles produced from rinsing dishes in a shallow sink. I could almost envision my cooking expertise setting up there beside them, pouting and mumbling, “She’ll forget about me completely before this trip is over. Soon it will be Hungry Man microwave dinners and Taco Bell for every meal.”

To be honest, I kind of had the same fears. Willie (our affectionate name for our bus/rv) isn’t exactly a culinary muse. His kitchen quarters are tight, his burners take light years to bring a pot of water to boil, and his sink can comfortably hold a dirty tablespoon and a small cereal bowl; anything more teeters on complete chaos. Therefore, while my heart wants to cook, my reason says, “Too much work.” So I feed my children yet another bowl of Cheerios and occasionally throw in a Nutella sandwich just to mix it up.

Until yesterday. I simply had to cook something. Forget the fact that our refrigerator was bursting with the fruits of others’ labors (an outstanding veggie soup from Shawn’s Aunt Kate , Panera leftovers, and piles of sweet Florida strawberries); I needed to blow the dust off my fingers and get them wrapped around a spatula and the handle of a frying pan, even if no one ate what they had to offer.

Well, it seems their offerings weren’t half bad; in fact, they even elicited a “You are the best cook in the entire world!” from my dear Cade; wow, I love that kid. Really, though, if you are looking for some hearty fare to make their bowls empty and their bellies full, this is what’s for dinner tonight.

Mai’s Ham and Bean Soup

2 tbsp. olive oil

2 garlic cloves, minced

¾ c. sweet onion, chopped (This is about half of a medium onion.)

2 c. cooked ham, chopped (I got this really tasty piece down here in Sarasota at a Farmer’s Market; some local yocal brand. It had a slight hint of maple in it. Mmm. Mmm.)

1 (14 oz.) can vegetable broth

1 bay leaf

¾ tsp. herbes de provence

2 (14 oz.) cans cannellini beans, drained

Saute garlic and onion in oil till soft, about 10 minutes (or 2 hours if you are cooking in Willie). Add ham, broth, bay leaf, and herbes de provence and simmer for 10 minutes. Add beans and cook for 10 additional minutes, and dinner’s done.

I served the soup with simple slices of bread, but if you are feeling a little frisky and happen to have an oven (which Willie does not possess), I’d encourage you to whip up a batch of cornbread and serve this over top a big slice. Merely a suggestion, but a really, really good one at that.

Friday, February 24, 2012

Our First Meal on the Bus: Willie's Chili


Over a week into our trip and I finally attempted to cook a meal in Willie’s kitchen. Mind you, I use the term “kitchen” here rather loosely. We have a 2 burner stove top, shallow-bowled sink, a small microwave, and 2 slivers of counter space about 20x6 inches each. I’m not complaining; I’m simply stating the facts.

Every family has an “all-star” meal. It’s the one dish you can put down on the table and feel confident that every member of your tribe will eat it. In our home, chili is that meal. (Okay, so not everyone is on board with it—Abra is currently in the “I will not eat anything without complaint, aside from cereal and my boogers” stage, but she doesn’t really count.) Therefore, it seemed only appropriate that our first home-cooked meal in our new “home” should be none other than chili.

The children read and played legos while I chopped and sautéed, and soon Willie’s musty odor gave way to the spicy aroma of simmering chili, making our “home” feel, now more than ever, lived in. And when we all sat down to eat together, everything suddenly felt normal again.

Sometimes, you need a break from a big adventure; you need to feel that everything is ho-hum and same-as-usual, just for a moment. Then you get up and do the dishes in your dwarf sink with a trickle of water so as not to fill up the waste tank and step out the bus door into the warm breeze blowing across an old slave plantation in south central Virginia, and you know the adventure is still here.

And you’re glad for it.

Willie’s Chili

2 tbsp. extra-virgin olive oil

½ of a medium sweet onion, diced

2 garlic cloves, minced

1 ½ tsp. ground cumin

1 tbsp. chili powder

1, 14 oz. can beef broth

1, 28 oz. can crushed tomatoes

1, 15 oz. can black beans, drained

1, 15 oz. can kidney beans, drained

1, 15 oz. can sweet corn, drained

2 tbsp. brown sugar

1 ½ tsp. salt

2 c. leftover steak, cubed

Whole wheat couscous, prepared

Shredded Sharp Cheddar

In a large pot over medium heat, sauté onions and garlic in oil till softened, about 8-10 minutes. Add cumin and chili powder, and cook, stirring constantly for 1 minute. Add broth and simmer with lid on for about 5 minutes. Add crushed tomatoes, beans, corn, sugar, salt and steak; stir. Cook over low heat for 30 minutes. Serve over couscous and top with cheese.

Now, it could be that we were far overdue for a bowl of home-cooked chili, but this pot received, quite possibly, the ravest reviews ever from my family. Cade confidently declared to the family, and the world at large, “Mama, this is the best chili you ever made!” He is only 8, and not exactly a gastronomic genius (the kid eats Vienna sausage by the dozens), but I did have to agree with him on this one.

Thursday, January 5, 2012

Creating Omnivores: Mai's Early Morning Pot-Roast


For the new year, my husband and I committed to getting up together in the mornings, 6 am specifically, so that we could stop the hectic cycle of being awakened by the kids at 7:30am, jumping out of bed in a state of frenzy, and beginning the day feeling simultaneously overwhelmed and exhausted.


Monday morning, we began.

Monday, January 2, 2012

A New Year's Challenge (With Vegetarian Chili on the Side)

Two Thursdays out of most months, I scurry around my kitchen assembling all the necessities for cooking (pots, utensils, aprons, etc.), stuff it all in an empty box or laundry basket, load it in my minivan along with my two oldest children, and drive the short distance to the local food pantry where we volunteer.

My role there is simple: cook.


I receive the same items for a meal that the food pantry patrons will receive at that day’s distribution. And with those ingredients, I create recipes that will give them options for interesting and healthy meals, then I make those recipes for the patrons while they’re waiting for their opportunity to gather their rations from the pantry.


I love to cook, so when this role presented itself, the fit felt perfect. But over the past year, the cooking has become secondary. Even now emotion chokes in my throat as I think of last month’s demonstration and the petite, white-haired woman who, with red-rimmed eyes, relayed to me the dire circumstances of her husband’s health, and how, without insurance, they couldn’t afford to buy the medication that keeps him breathing.


“I’m so so sorry,” I whispered, tears blurring her form before me as she spoke.


“He says he’s not afraid to die, but he’s not ready yet,” her voice quivered as she whispered the next few words, “and I’m not ready to lose him.” As I slid my arms around her trembling shoulders, shaking with her stifled sobs, I felt helpless. I felt small. I felt ill-equipped.


And I felt that I was right where I needed to be.


In the New Year, so often our resolutions center around self-improvements we hope to achieve through more effort: lose weight, eat healthier, exercise more.


I challenge you this year to follow your passion (cooking, art, singing, photography, etc.) to a place where you don’t have the solutions or the answers, to the place where you are simply arms open wide ready to welcome the broken-hearted.


And just see the self-improvements that come from that.


Today’s recipe is taken from one of the cooking demos I did this past year. It’s cheap (a plus after the havoc the holidays can have on our finances), healthy (because the holidays tend to wreak even more havoc on our waistlines), and oh-so-easy.


Mai’s Vegetarian Chili


2 tbsp. olive oil


1 c. chopped onions or 1 tsp. onion powder


1 garlic clove, chopped or ½ tsp. garlic powder


1 tbsp. chili powder


1 tsp. cumin


1, 28 oz. can of crushed tomatoes


1, 14 oz. can of pinto beans, drained


1, 14 oz. can of black beans, drained


1, 14 oz. can of sweetcorn, undrained


1 c. vegetable broth (if you’re not too worried about the whole “vegetarian” bit, beef broth works nicely here)


¼ tsp. ground pepper


1 ½ tsp. salt


In a large pot, heat olive oil. Add onions and garlic, and sauté for 5-8 minutes, or until veggies are softened. Add chili powder and cumin and sauté for another minute. Then add tomatoes, beans, corn, pepper, and salt (if you made the bean salsa recipe from last week, feel free to throw your leftover beans and corn into the chili at this point for a slightly chunkier version). Simmer for 30 minutes and serve.


My kids can’t get enough of this chili. When I’m feeling down in the dumps, I simply whip up a pot of this and sit back in my easy chair to absorb all the compliments. When I made this for lunch last week, my daughter, after eating a bowl full, stormed into the bathroom where I was showering and declared, “Mom that chili was delicious!” and then quickly exited. Gotta love that kind of affirmation!


Wednesday, November 2, 2011

Broccoli Soup to Sway the Hearts of Panera Lovers


I absolutely love to go out to eat. However, in the past two years, the frequency of eating out in our household has diminished greatly. When my husband’s painting business plunged into ruin with the rest of the U.S. economy in 2008-9, we were left with some hefty debt. So we did what any responsible couple with four children would do: we moved into my in-law’s basement and my husband became a full time writer.

Smart thinkin’, right?

Well, against all odds, our tactic worked. Sure it took a lot of financial belt-tightening on our part, loads of inspired and beautiful writing on my husband’s part, inexplicable graciousness on the part of our lenders, and far more than a sprinkling of help from the Big Guy Upstairs, but we are now almost debt-free!

So occasions when we do get to go out to eat are a very big deal in our family simply because our current budget cares more about repaying our debt than feeding my desire to be served and cooked for. And unfortunately, when we do have the opportunity, my children unanimously vote to go to Panera Bread for our one meal out.

Now, if these kind of opportunities happened every other day, it wouldn’t be a big deal. But considering the infrequency of these events, I feel majorly jipped if we spend our meal at a chain restaurant rather than an inspired mom-and-pop sort of joint where grandma bakes the bread and daddy makes the stew.

Therefore, I devised a plan to put my kids off good ole’ Panera. They’re favorite item (and the only item they ever order) is the broccoli cheese soup. So I got my thinkin’ cap on and decided that if I could make my own delicious version of this dish, perhaps I could sway them from their devotion by filling them to the brim with that soup at home so that the very last thing they want to do is eat another bowl full.

Here, my dear friends, is the attempt—and I must admit that it is a mighty fine attempt at that (and the kids LOVED it).

Mai’s Broccoli Cheese Soup

1 tbsp. butter
1 large head broccoli, broken into flowerets
1 large carrot, shredded
½ cup onion, finely chopped
2 garlic cloves, minced
1 tsp. dried basil
2 tsp. Worcestershire sauce
2 c. chicken broth
½ lb. cheddar cheese, shredded
½ c. sour cream
2 c. half & half
1 tsp. salt
1 tsp. freshly ground pepper
¼ c. flour

Melt butter in a large pot. Add broccoli, carrot, onion, and garlic, and sauté for 10 minutes, or until veggies begin to soften. Add basil, Worcestershire, and chicken broth. Cook veggies in simmering broth until broccoli reaches your desired tenderness, about 5-10 minutes. Reduce heat and add cheese, sour cream, half & half, salt, and pepper. Ladle out two scoops of soup into a small bowl. Add ¼ c. flour to bowl and make a thick roux. Pour roux into pot and simmer soup over medium heat until soup thickens. Serve with crusty bread.

Wednesday, October 19, 2011

My Past, Present, and Future Through the Eyes of Food


Thinking back through my life, I’ve realized I can categorize each major phase of my past based upon the ethnic foods I ate or cooked during that time. Strange, but true:

Childhood- Hawaiian/Chinese- My dad was born and raised in Hawaii so most of my childhood years were spent eating meals of my dad’s homemade teriyaki and rice, chicken curry stew, and char sui. Even after my parents split up, we’d spend many week nights at my dad’s apartment slurping up saimin while my mom worked 2nd shift at the airport. To this day, the first thing that signals I’ve arrived at my parents’ house is the wafting aroma of soy sauce and garlic I smell with the first step I take through their front door.

College- Italian- I don’t know that it’s really fair to label the pizza served at the Messiah College Falcon Express as truly “Italian” but I did eat an exorbitant amount of pepperoni pies and deliveries with “The Works” during my college years. Whenever I smell a Papa John’s Pizza, I’m immediately transported back to the fluorescent-lighted halls of the Miller/Hess dorm in Grantham, PA.

Early Marriage-Southern American- As a young domestic goddess, I really cut my “cooking” teeth by preparing the traditional American/Southern dishes that inspired me through the pages of magazines like "Taste of Home" and "Quick Cooking". Shawn and I ate lots of casseroles back then: meat, cheese, and rice combos with cheap ingredients and lots of leftovers. Nothing exotic or even that flavorful, but I took great pride in the fact that “I cooked it!”

England- Indian- When we moved to England, my culinary eyes were finally and fully opened to the vast array of flavors that existed out there in the great big world. And my love (and sometimes obsession) with Indian food began. The New Akash in Great Missenden drew me in with their pristine silver serving dishes, coddling wait staff, and Lamb Tikka Bhuna with Saag Aloo that convinced me I must have lived in the city of Bombay in another life.

And now I’ve hit a phase where there seems to be no dominant theme, either in the food or the purposes of my life. It’s a crossroads, I’m realizing, and it’s exciting, seeing my past mesh beautifully with my present, creating my future:

On Monday I am a girl again, marinating long slices of cold, marbled beef in my dad’s rich teriyaki sauce.

On Tuesday, I feel the care-free naivete of my college self as I roll out the soft, fragrant dough for my cheese pizza.

On Wednesday, I adopt the thrift and carefulness of my young married self, tears gliding down my cheeks as I chop candy-sweet onions for my chicken and rice casserole.

On Thursday, I feel adventurous yet wise, grinding the spices of my Lamb Vindaloo in my mortar and pestle, fragrances of cumin and ginger swirling through my kitchen.

And on Friday, I can be something altogether new…

Mai’s Mexican Casserole

1 lb. ground beef, cooked and drained
1 recipe of Mai’s crockpot refried beans, (but don’t mash up the beans once you’ve cooked and drained them and there's no need to save the liquid. The beans in their natural, cooked state are all you're after here.)
2, 10 oz. cans enchilada sauce (or by all means, use your own. If anyone out there has a good enchilada sauce recipe, I’d love to have it!)
1, 8 oz. can tomato sauce
1, 16 oz. pkg. of corn tortillas, torn into bite-size pieces
1 lb. of Mexican blend cheese
salsa, sour cream, and green onions for toppings

Preheat oven to 350 degrees and grease a 9x13 inch pan.

Combine first 4 ingredients in a large saucepan and bring to a simmer, just to warm all the ingredients through. Meanwhile, layer half of torn tortillas in the bottom of the prepared pan. Spread half of meat/bean mixture over top of tortillas. Sprinkle half of cheese on top of meat/bean mixture. Repeat layers, ending with cheese.

Bake for 25-30 minutes, or until casserole is bubbly and cheese is melted. Serve with salsa, sour cream, and green onions.

So what about you? Can you categorize phases of your life the same way? What phase are you in now?

Monday, October 18, 2010

Crack Open the Crock Pot

Slow-cooking season is finally upon us. I love, love, love autumn, and one of the things I love about it is the legitimate use of crock pots. Don’t get me wrong—I use mine all year round. But I feel kind of wrong about it in the summer when my backyard is basically a slow cooker of it’s own. However, when the temps start to hover in the 50’s and 60’s during the day and I know for sure that autumn is here and not just visiting, I love to get the crock pot out and heat up the kitchen with the smells of slowly-simmering soups, stews, and roasts.

I’m also one of those people who hates using temperature controls in my home. I’m happy to swelter in the blistering heat of my living room if I know I’m saving a few bucks on the electricity bill. My husband, however, is quite the opposite. He just wants to be cool or warm, depending on the season, and he has no problem letting the electric company assist him in that quest. So I love the fact that the heat from a toasty warm crockpot keeps my kitchen cozy without having to run the full-blown heater.

Today’s recipe is one of my all-star slow-cooker recipes and it’s become quite a favorite among our friends and family. These pulled pork sandwiches make me forget my convictions about meat consumption everytime; before the word “vegetarian” can even escape my lips, I’ve already eaten half a sandwich and can’t wait to wrap my mouth around the other half. Wrong, I know, but oh, so, right…

Mai’s Slow-cooker Pulled Pork Sandwiches

2/3 c. onion, finely chopped
½ c. ketchup
¼ c. cider vinegar
½ c. brown sugar
1, 6 oz. can tomato paste
1 tbsp. sweet paprika
1 tbsp. smoked paprika (Besides the pork, this is the most important ingredient of the whole recipe—you simply have to have this or it’s not even worth making. It’s an easy spice to find; most grocery stores carry it these days.)
2 tbsp. Worcestershire sauce
2 tbsp. Yellow mustard
1 tsp. salt
1 tsp. black pepper
4 lbs. fresh pork (You can take two different avenues here. If you want something a bit healthier, go ahead and use pork loin. If you don’t mind the extra fat, use a pork shoulder roast, with or without the bone-it depends on whether you want to mess around with bone when you’re shredding the meat.)
12 Kaiser rolls (If you don’t use Kaisers, then at the very least, don’t pick up an 8 pack of those wimpy hamburger buns you are accustomed to buying. They simply won’t cut it. This is a hummer of a sandwich that requires a full-time bun to hold in the all the meat and juices.)

In a 4 or 6 quart crock pot, mix together all the ingredients except the pork. Then add your pork and turn it over in the sauce just to make sure it’s nice and coated. Set the crock pot to low for about 8 hours and get on with your day.

Once you near the 8 hour mark, check on the meat to see if it’s nice and tender. Remove the pork from the crock pot, place on a big plate or cutting board and begin shredding it. Add the shredded pork back to the sauce, give it a good stir, and you are ready to roll (that’s a pun in case you didn’t notice).

Personally, my favorite way to eat this sandwich is with a big ole’ spoonful of coleslaw on top of the pork; my husband can’t think of a better way to ruin a sandwich. I’ll leave that one up to you.

Saturday, September 4, 2010

Money, Money, Money: Revolution Roadblock #2

A big thanks to all of you out there who decided to get involved in the charity:water project that was introduced on Tuesday; it feels pretty great when we get to be a part of something bigger than ourselves by helping people other than ourselves. Please pass on the word and let's reach that goal!!

Today, I'm back on my old soap box again. When attempting a Food Revolution (like I am) you have to be aware of the hindrances that keep something like this from really taking off. A couple weeks ago I tackled the issue of time aka Revolution Roadblock #1.

I think the next biggest obstacle will probably ring true for quite a few of you out there; I know it does for me. I think I’ve mentioned before that I am a stay-at-home mom and my husband is a writer and we have four little babes, so we aren’t exactly rolling in the old greenbacks.

I appreciate the fact that buying organic or even fresh fruit and veggies isn’t always (most times, never) the most budget-friendly choice. The truth is, I don’t ALWAYS buy organic. I buy it when I can. I basically have a hierarchy system to help me figure out what and when I should buy organic, which I will share with you tomorrow.

But while I am acutely aware of the challenges a strict budget can present when trying to feed your family a healthy diet, I by no means think it is impossible. Last week I had a pathetically small grocery budget to work with because I had a few too many splurges in the middle of the month which left me with very little for the end of the month. I kind of have a habit of doing this.
Honestly, though, I kind of like the challenge. There's something really satisfying in knowing that I've fed a family of 6 with less than $5 worth of ingredients. Okay, I don't want to do this every night, but occasionally it is kind of fun. And below is most definitely one of my favorite budget-friendly meals of all time for these reasons, in no particular order:

1. Because it's got an Indian flair to it, and I absolutely adore Indian food. I could honestly eat it every day for every meal, and that's no where close to being an exaggeration. Just ask my husband.

2. I made this recipe last Wednesday afternoon while my kids were spending a couple hours at their grandparents' house. When my son walked in the door at dinnertime, he shouted, "It smells AMAZING in here!"

3. It tastes even better than it smells. My kids, ages 1 to 7, all loved it and cleaned their bowls. Since there were no leftovers to scavenge, I had to eat a second bowl myself. Oh, darn.

4. It's vegetarian, so it's easy on my conscience and my pocketbook.

With no further ado:

Indian Lentils and Rice

1 tbsp. olive oil
3/4 c. chopped onion
3 garlic cloves, minced
1 tbsp. minced peeled fresh ginger (Don't try and use ground ginger in this and think you're going to get away with it. A little knob of fresh ginger from the produce aisle will cost you about a quarter. I think you can splurge.)
1 1/2 tsp. curry powder
½ tsp. ground cumin
4 c. water
1 ½ c. dried red lentils (You can find these in the Hispanic section of your supermarket. If you've never used lentils before and you have a tight food budget, may I introduce you to your new best friend.)
1 c. chopped fresh tomato (The other day when I made this, I didn't have any tomatoes so I just used 1 1/2 c. tomato sauce and reduced the water to 3 cups. Worked beautifully so consider that as an option.)
1 tsp. salt
¼ c. chopped fresh cilantro
3 c. freshly cooked rice

My kids are a little nutso about their food having a smooth texture, so I just go ahead and whiz the onion, ginger, and garlic together in the food processor. Heat the olive oil over medium heat and add the onions, ginger, and garlic and saute for a couple minutes, just to soften. Then add the curry powder and cumin. Stir that around in the pan for about 30 seconds, just to get the spices nice and toasted. Add the water, lentils, tomato, and salt. Simmer for about 20 minutes, or until lentils are soft. Add the chopped cilantro, pile on top of the rice, and you are ready to tuck in.

This recipe will usually feed my entire family for dinner and have enough leftovers for me to sneak in the next afternoon and scarf the rest down for lunch before my husband catches wind of my devilry. Hee, hee.

Thursday, July 22, 2010

Unlikely Heroes: P90x and Mind-blowing Turkey Burgers

I’m sitting here eating a bowl of cherries as I write this blog. Do I wish it was a bowl of peanut butter cup ice cream slathered in hot fudge? Yes. Do I feel like a better mother because it’s not? Yes. Will my pants fit better tomorrow because it’s not? Absolutely (unless I try to get a similar sugar high by eating the remaining quart of cherries in my fridge, the five peaches setting on my counter and the pint of blueberries I bought this morning; then I think I might have more serious issues than the tightness of my pants).

So I have three days left in my fast. We’re getting to crunch time, folks, so I need to get really focused. Hence, I’m implementing a tactic I use while working out in the morning to help me get through this final push of the fast. I’m currently doing P90x, and in the Plyometrics routine, they have this little exercise called Hot Foot. Basically, all you do is hop on one foot for 30 seconds and then switch feet and repeat. Sounds innocent enough, right? WRONG. Just go ahead and try it. No, really, right now get up from your computer and break out your old hopscotch moves. Well, if you did, you would quickly realize that this tiny little grade-school recess exercise burns the bejeezus out of your calf muscles.

Now, the way I manage the pain in the middle of this routine is that after the first 30 seconds pass and I get to switch feet, I then focus all my thoughts on how good the leg feels that is no longer hopping. I get all caught up in the wonderfulness of the resting leg that I kind of forget about the leg that’s doing the work and before I know it, the minute is up.

I’m implementing that same tactic here. My jumping leg is “the treat fast”. It’s burning really bad right now. It pretty much feels like someone is pouring molten hot lava down my calf. Thankfully, I have my resting leg, “non-treat-yet-still-yummy food”, to keep me going through the routine. So I’m keeping my thoughts on the non-treat yummies, and the first one that comes to mind is this beautiful turkey burger rendition that completely knocks my socks off everytime I eat it. You’d think after eating it over a dozen times, the surprises would end. Not so. There are fireworks every time.

I’m providing the link to this one for two reasons:

1. I usually change recipes I find in magazines enough that I can call them my own. Most times, I find they need tweaking. Not true with this one. I follow it to the “t” and with fabulous results everytime.
2. This tastes too good for me to take all the credit. It wouldn’t be right for me to pass this off as my creation and then you go spread it throughout the whole earth as Maile’s Mind-blowing Turkey Burgers. I couldn’t feel right about that. So I will lead you straight to the source with a clear conscience.

Well, folks, I’m going on vacation. The fam and I are heading out for a week of relaxation and fun, so things will be quiet around here for a while. But I’ll be back the first week of August with more recipes and tales from Mai Time in the Kitchen! Farewell till then!

Monday, July 19, 2010

Jamie Oliver Makes His First Appearance on Manic Monday

I'm not sure what the rest of you are doing for Manic Monday, but I'm serving up some fresh, hot leftovers. We had houseguests this weekend, and it always seems that when I have visitors, my refrigerator gets jam-packed with leftovers, which works out great, because the last thing you have time to do after a busy weekend is spend time in the kitchen cooking. So I'm taking a break from the kitchen today, and planting myself in the laundry room because I have LOTS of wash that needs attending.
But for those of you with the "bare-fridge blues", here's a wonderfully simple recipe from my favorite chef at the moment, Jamie Oliver. You can't go wrong with any of his recipes but this one in particular is tailor-made for Manic Monday. Now, the laundry is calling so I leave you with in Jamie's hands:

Baked Camembert Pasta by Jamie Oliver

8 oz. round of Camembert cheese (I haven't tried this with brie but I have a pretty good feeling that it would work just as well. Give it a try and let me know how it turns out.)

2 cloves of garlic

1 sprig fresh rosemary

extra virgin olive oil

sea salt and freshly ground black pepper

1 lb. dried rigatoni

6 cups (approx. 6 oz.) fresh spinach leaves

4 oz. Parmesan cheese

Preheat you oven to 350 degrees. Open the box of cheese and unwrap it. Place it back in the wooden container. Score a circle into the top of the skin, then lift it off and discard. Peel and finely slice the garlic. Pick the rosemary leaves off the woody stalk. Lay the garlic slices on top of the cheese, sprinkle with some pepper and drizzle with a little extra virgin olive oil. Scatter over the rosemary leaves and gently pat with your fingers to coat them in oil. Grate the Parmesan.

Place the box of cheese on a cookie sheet and put it into the preheated oven for 25 minutes, until golden and melted. Meanwhile, bring a large pot of salted water to boil. When your cheese has 10 minutes left to cook, add the rigatoni to the pot and cook according to the package instructions. When the pasta is cooked, add the spinach to the pan- it only needs 10 seconds or so. Drain the pasta and spinach in a colander over a large bowl, reserving some of the cooking water. Return the pasta and spinach to the pot and let it wilt. Drizzle with a couple of good lugs of extra virgin olive oil and add the grated Parm. If the sauce is too thick for you, add a splash of a the reserved cooking water to thin it out a bit. Season with salt and pepper and give it a good stir. Remove the cheese from the oven.

Divide the pasta between your serving bowls. Either drizzle the melted Camembert on top or pop the box of cheese on the table and let everyone help themselves to a lovely, gooey spoonful.

Tuesday, July 13, 2010

A Summertime Classic Cookbook

Okay, so I feel really bad about making you get out your slow-cooker in the dead of summer for yesterday’s recipe. Therefore, today I’m going to do my first cookbook review of a collection of recipes that is dead set on keeping the heat in your kitchen to an absolute minimum.

The cookbook is No Cook Pasta Sauces by Joie Warner. I received it as a wedding gift 10 years ago and every summer I whip it out when the heat outdoors gets to my brain and puts me in a cooking coma.

I love this cookbook because the recipes are simple but diverse so one day you could have linguine with an Italian flair, perhaps Lemon Basil Pesto, and the next day, from the same cookbook, you can satisfy a hankering for Chinese by whipping up some vermicelli with Asian Peanut Butter and Garlic Sauce. It’s such a versatile book and nearly all the sauces can be whipped up without the stove, or simply warmed in a heatproof bowl over your boiling pasta.
The recipe below is one of our family’s favorites from this cookbook; hope you all enjoy it as much as we have through the years!

Creamy Roasted Red Pepper Sauce

1 jar (7oz.) roasted red peppers, well drained and pureed in food processor
1 large garlic clove, finely chopped
Grated zest of 1 medium lemon
¼ c. butter, at room temperature
½ tsp. salt
Freshly ground black pepper
¼ c. freshly grated Parmesan cheese, plus extra for serving
1/3 c. fresh basil leaves, cut into strips
8 oz. fettucine

Combine pureed red peppers, garlic, lemon zest, butter, salt, pepper, and Parmesan cheese in pasta serving bowl. Set aside to warm to room temperature or, preferably, place the bowl (be sure it’s heatproof) over the pasta pot to melt the butter while heating the water. Once the water comes to a boil, remove bowl and set aside.

Cook pasta in large pot of boiling salted water until al dente. Drain pasta well and immediately add to sauce in bowl. Sprinkle with basil and toss. Serve at once with extra Parmesan cheese. Serves 4.

Tune in tomorrow for a recipe that is one of my dad’s all-time favorites, and it also earned him the most chilling stink eye I’ve ever bestowed on another human being.

Crockpot Refried Beans: Heart Healthy and Saving Cows

I know this isn’t crockpotting weather, folks, but desperate times call for desperate measures, and in case you didn’t notice, we’re in a recession. So it’s time to tighten the purse strings and pull out the slow cooker for today’s recipe. I guess if I’m really honest, making your own refried beans is not going to be your saving grace if the debt collectors come to call; it will save you maybe $2.95, and the heat your crockpot is going to generate in your kitchen will probably cause the a/c to kick in a little more often than usual, so when it’s all boiled down, you might actually pay more to make refried beans at home than buying a can at the grocery store. I’m realizing that I should probably ditch the economical argument for these beans right about now, but I won’t give up on this recipe yet. I still have the health angle going for me.

This pot of beans has no fat and tons of flavor, a perfect match to the homemade salsa you made yesterday (which I am absolutely certain that you made; probably a double batch, you over-achiever, you). Seriously, I’ve had the beans in a can and what I’m proposing below will completely annihilate anything you buy at the grocery store. And just think, by surpassing the ground beef in your tacos tonight and replacing it with these homemade, healthy, delicious refried beans, you’re saving another cow. Well done.

Crockpot Refried Beans

½ c. onion, finely chopped
1 ½ c. dry pinto beans, rinsed
½ fresh jalapeno pepper, seeded and chopped (Don’t worry if you’re not a fan of spicy. These beans don’t have any kick to them. The jalapeno just adds a nice flavor.)
2 garlic cloves, minced
2 tsp. salt
1 tsp. pepper
¼ tsp. cumin
4 ½ c. water
Shredded Cheddar Jack cheese for serving

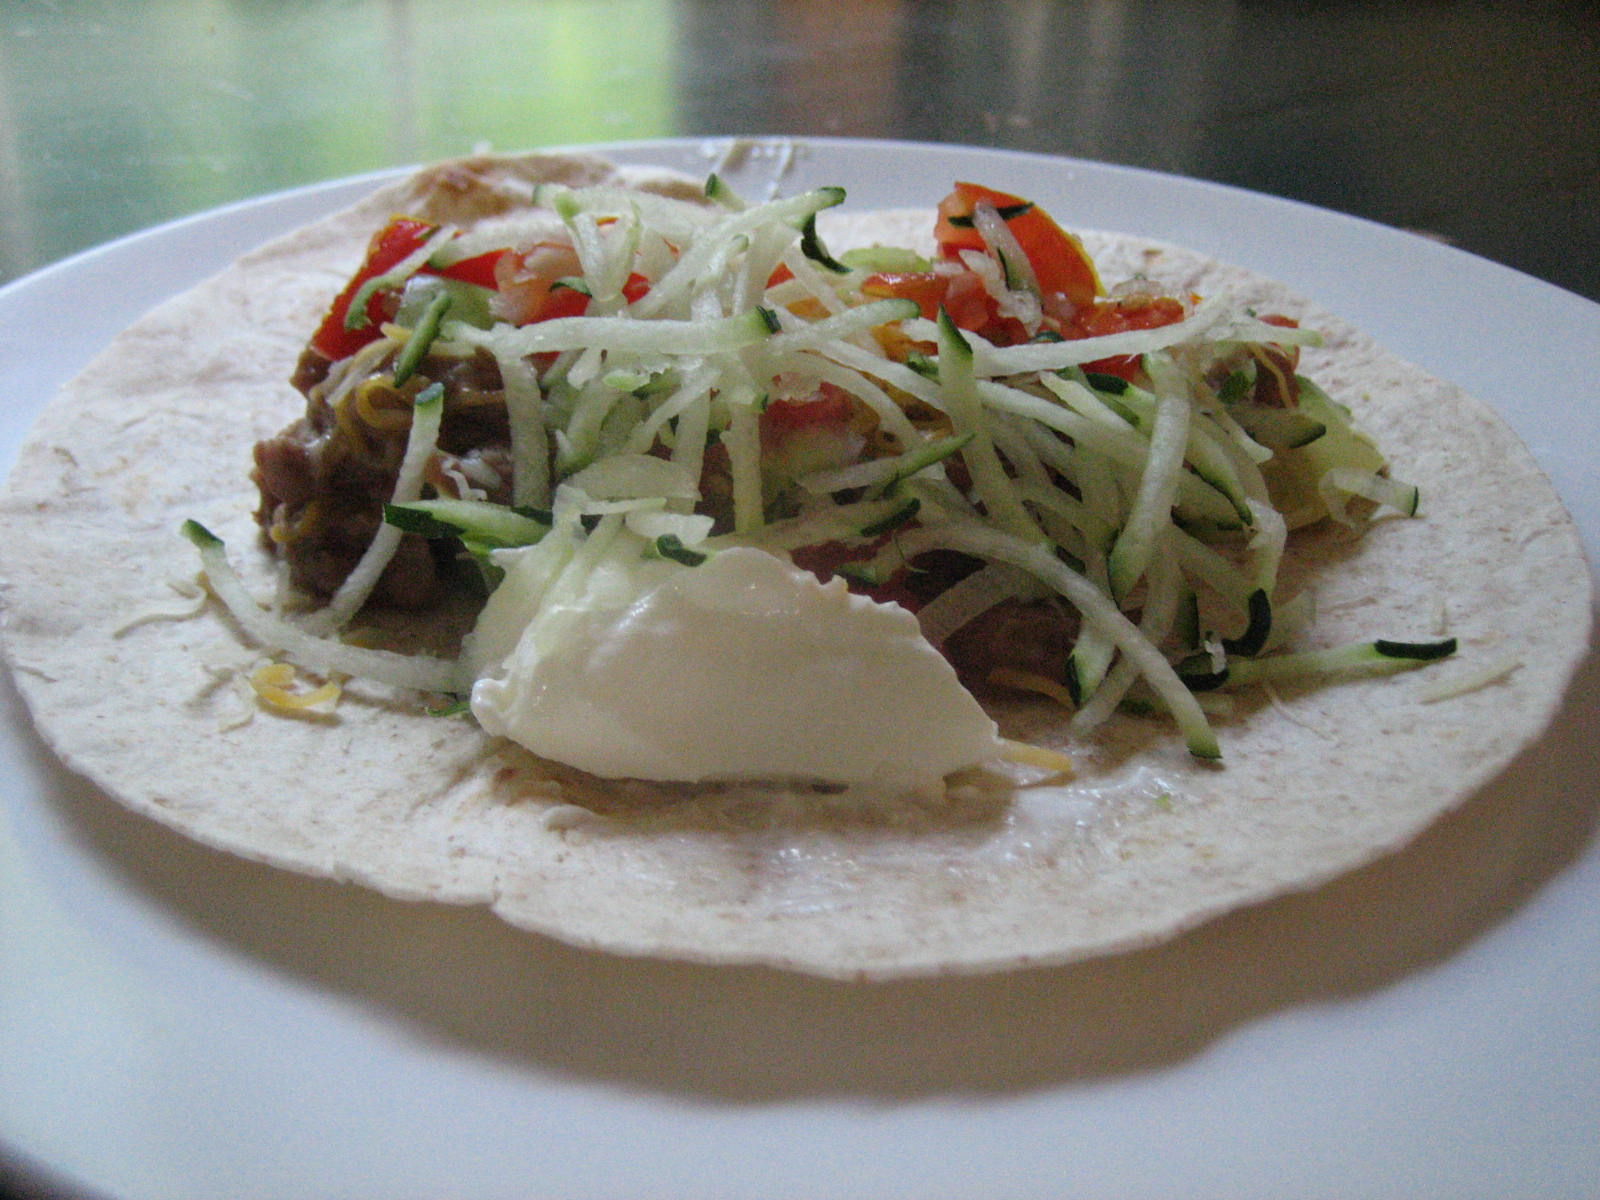
Dump everything in your crockpot, give a quick stir, and cook on high for about 6 hours (I guess it could take longer depending on your slow cooker, but the high heat on mine should be renamed “Hades” because that’s the kind of hellish heat it pumps out) or low for about 10. Strain the beans but be sure to save about 2 cups of the liquid. Mash up the beans, adding bean liquid as you mash, till the beans reach a consistency you’re comfortable with. Top the beans with a thin layer of shredded cheese. Grab your warm tortilla, slather a big spoonful of these beans down the middle, nestle some fresh salsa on top and perhaps, if you're daring, a dollop of sour cream, and dinner is ready. (In the above picture, I also have some shredded zucchini on top. Really, I have this stuff coming out of my ears right now so I pretty much put zucchini on everything that goes in my mouth. But it actually tasted really nice on the tacos so you can always give that a try, too.)

Disclaimer: While I whole-heartedly promote this spectacular recipe, I cannot be held responsible for the gastro-intestinal issues it may induce later on in the evening, so I wouldn’t suggest making this for an anniversary or Valentine’s Day dinner. Probably want to stick with pasta on those nights. Otherwise, enjoy!